

If your home is not built on a concrete slab, then chances are you have crawl space under the house. These crawl spaces were designed for a number of reasons, including ventilation under the house. Depending on the construction of your house, this crawl space could be a low as 2 feet, but as tall as 6 feet.
For many years building codes were written that required the crawl spaces to vent into the home. For the most part, these have been rewritten and no longer is that the case. Much of this centered around inside air quality and the introduction of moldy, musty air coming from a crawl space. If you are experiencing excessive allergy issues and are not able to find any obvious signs, you might be having an issue with your crawl space.
The most common repair for excessive moisture in a crawl space under a house is to encapsulate the entire crawl space. This will not only mitigate the harmful effects inside your home, but it can prevent costly structural repairs to your home. The process can be daunting and should be carried out by a professional crawl space repair company.
5 Step guide to a Crawl Space Encapsulation DIY project
If you have the means to accomplish a DIY project like this here is what you need to do:
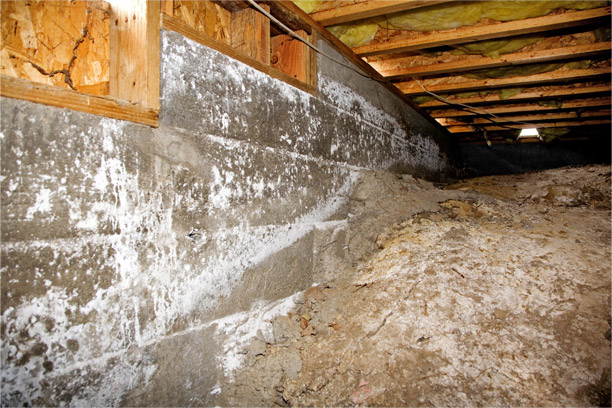
Step #1 You need to do a thorough inspection of the entire crawl space under your house. It would help if you have the original floorplan available to you before you start. Be sure to inspect every square inch of the crawl space. You need to check for any mold and mildew, if found it needs to be cleaned up and sprayed with a preventative solution. Check to be sure that the ground is properly graded to keep water from entering from outside. Check for any leaks from water, drain, or gas pipes, repair them if any are found. Lastly, check the moisture level of the air inside the crawl, if it is too high, you will want to use a dehumidifier.

Step #2 If your inspection uncovered any structural issues, you will want to be sure that you address the issues. They all need to be completed before you can move on to the needed step. Place close attention to floor supports and ensure that there are no soft spots. If you find anything of note, you need to address them all.
Step #3 Install a vapor barrier around the entire crawl space which will also provide an additional level of insulation depending on the material you choose. Be sure to seal all vent covers and doors with hydraulic cement. Foamboard is optimal for covering walls and fiberglass batting for the ceiling.
Step #4 Remove any existing moisture barrier in order to install the new moisture barrier. The moisture barrier is very important since the moisture is responsible for the majority of the musty odors that you are encountering. The moisture barrier should cover the entire crawl space including the ground. Use waterproof tape to adhere the poly cover to all pipes and walls.
Step #5 The final step is to ensure that the crawl space is completely dry. Using a powerful dehumidifier to remove any excess moisture before you can call it done. Be sure to invest in a moisture monitor that you can check frequently.
Finally, you always do frequent and thorough inspects of your crawl space. This will help you to catch any potentially serious issues that could easily affect your home’s structural integrity. By keeping an eye on the moisture indicator and maintaining the dehumidifier will go a long way toward keeping your home’s air quality high.